Hosting an Unturned Server on Raspberry Pi 5
Unturned Server on Raspberry Pi #1
MCrow • one year ago
MCrow • one year ago
This is step by step guide on how to create an Unturned server on a Raspberry Pi 5. It uses a Docker image to run the server and Box64 to emulate x86_64 architecture on ARM64.
Raspberry Pi 5 is a single-board computer and it is powered by a quad-core ARM Cortex-A72 processor and has 4-16 GB of RAM. I recommend getting the 8GB version with the following accessories:
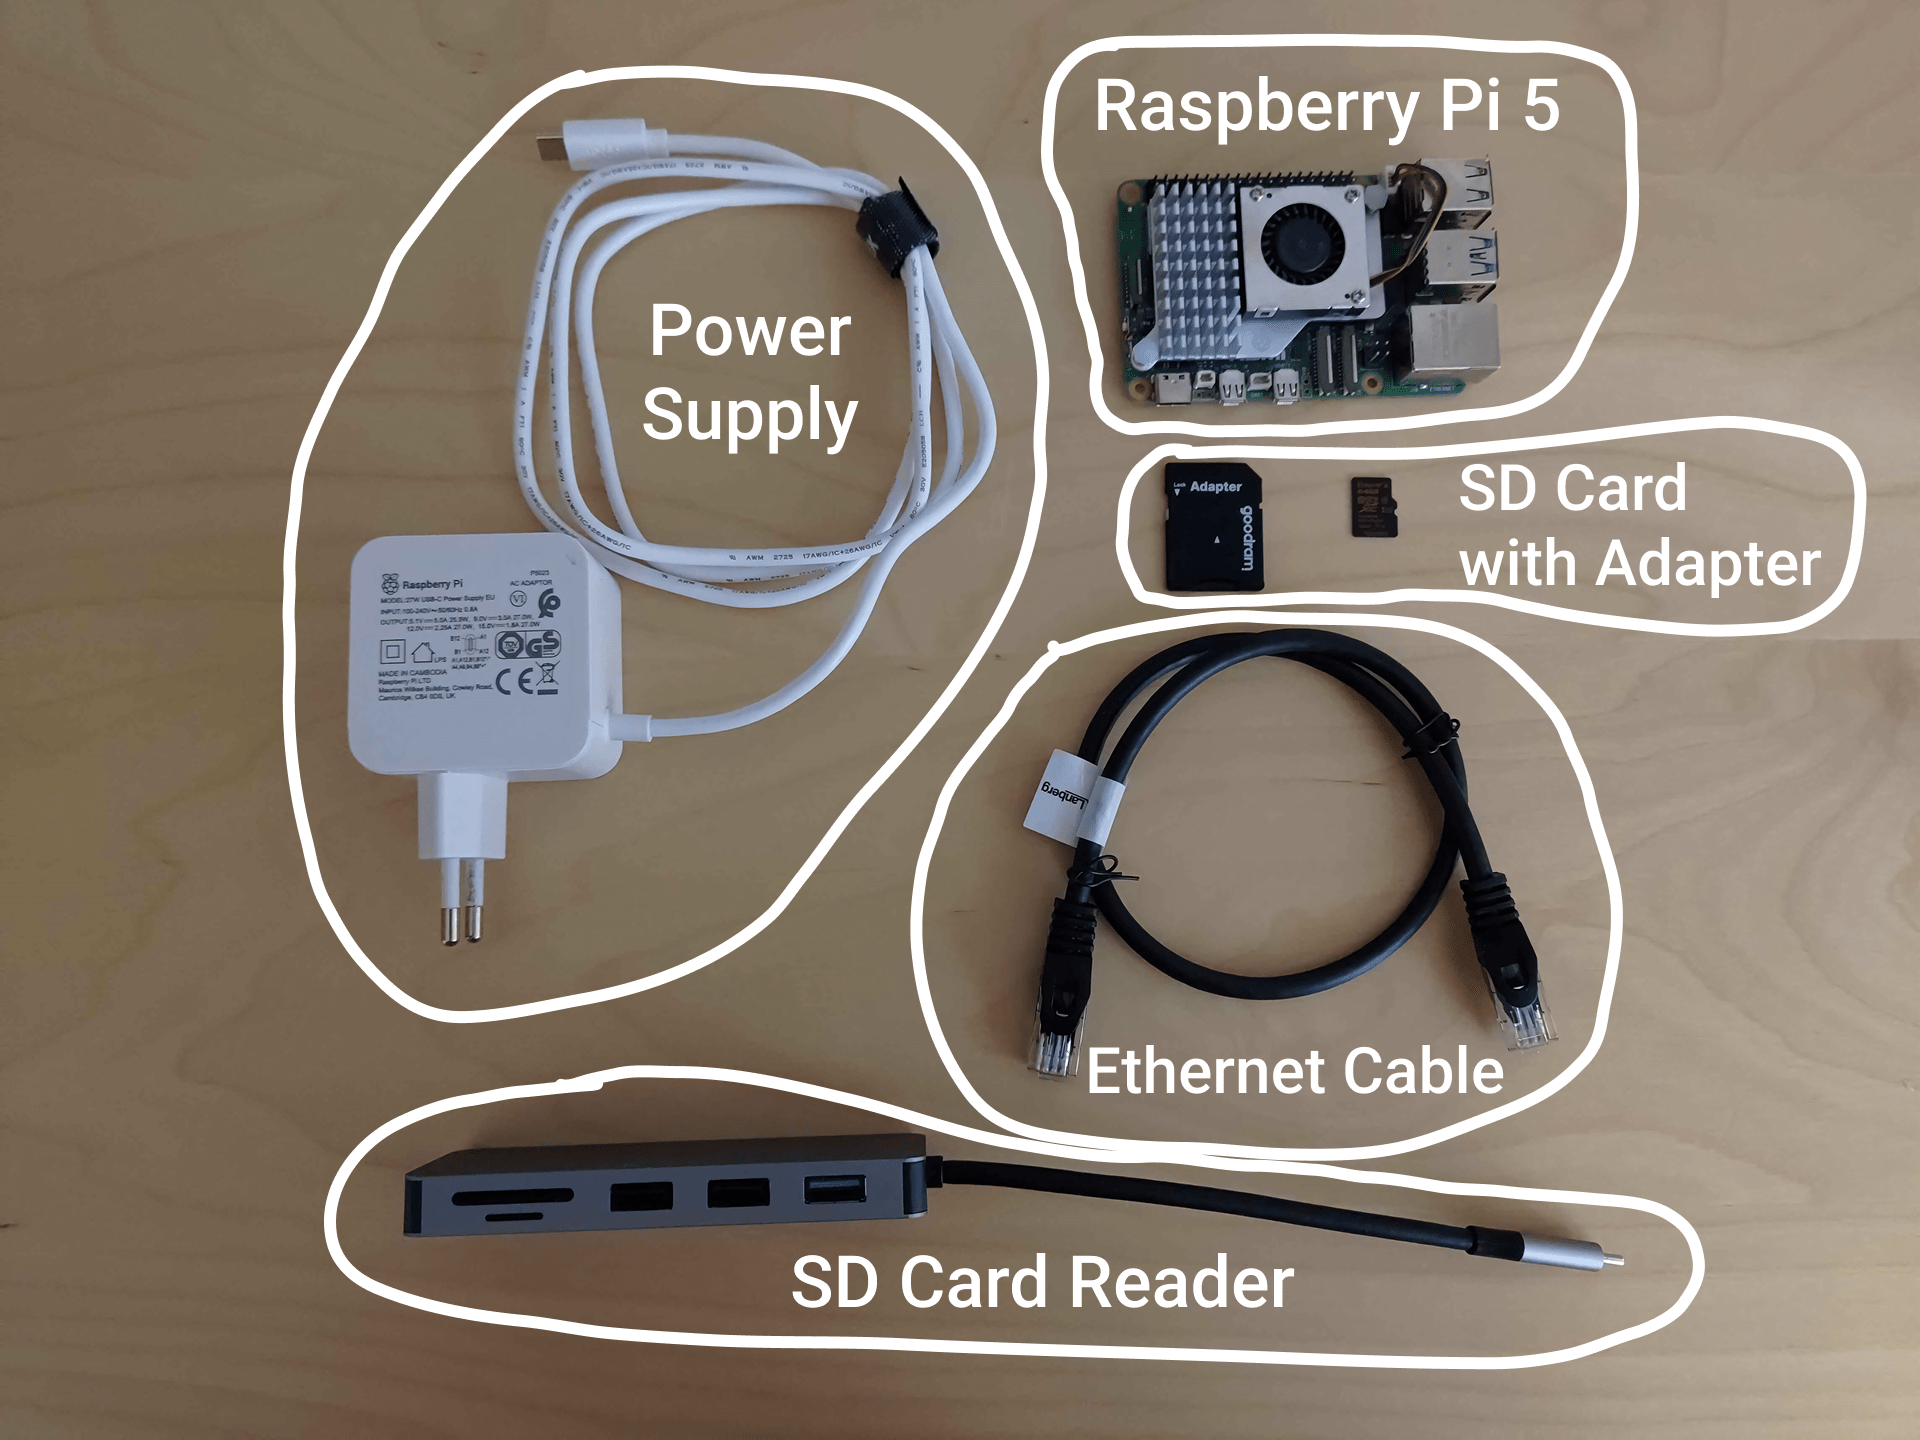
You may want to look into getting a kit that includes all of these accessories.
Raspberry Pi 5 on Amazon: https://amzn.to/3CspL8r
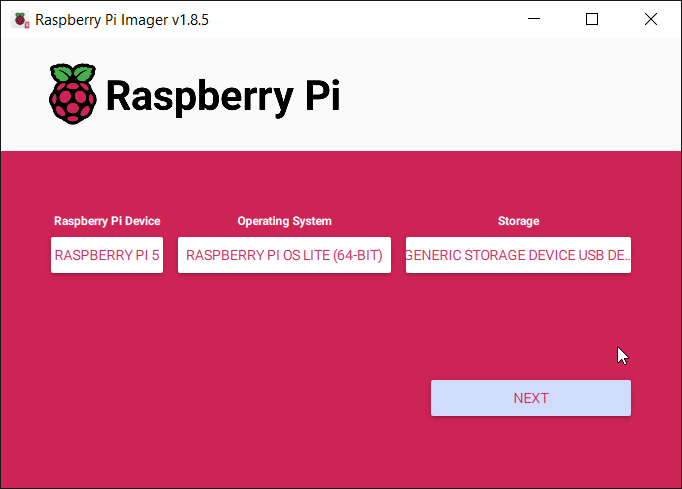
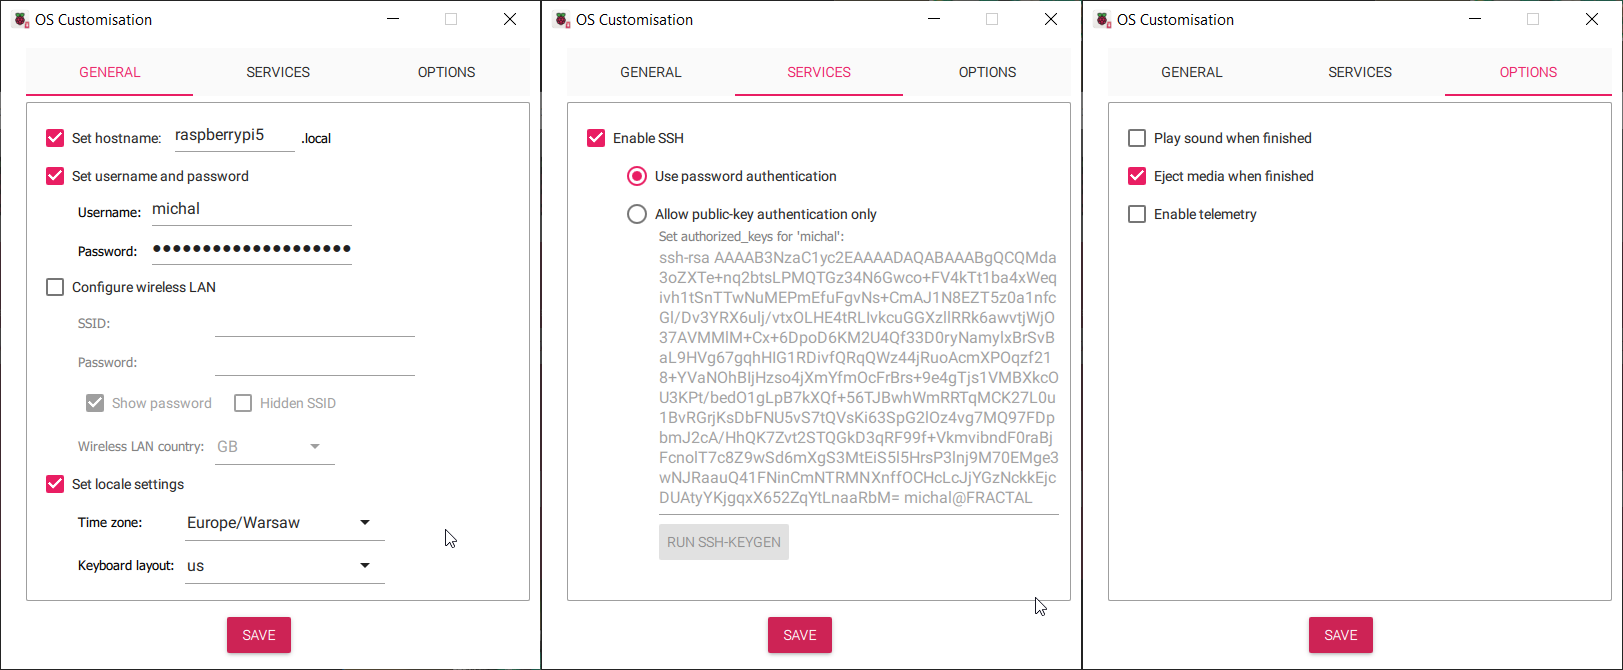
First you need to install Raspberry Pi OS on your Raspberry Pi 5. The easiest way to do this is to use Raspberry Pi Imager. You can download it from the official website.
I recommend installing Raspberry Pi OS Lite (64-bit). This will give you a minimal installation without a desktop environment, which is not needed for a server. We will be using SSH and SFTP to manage the server.
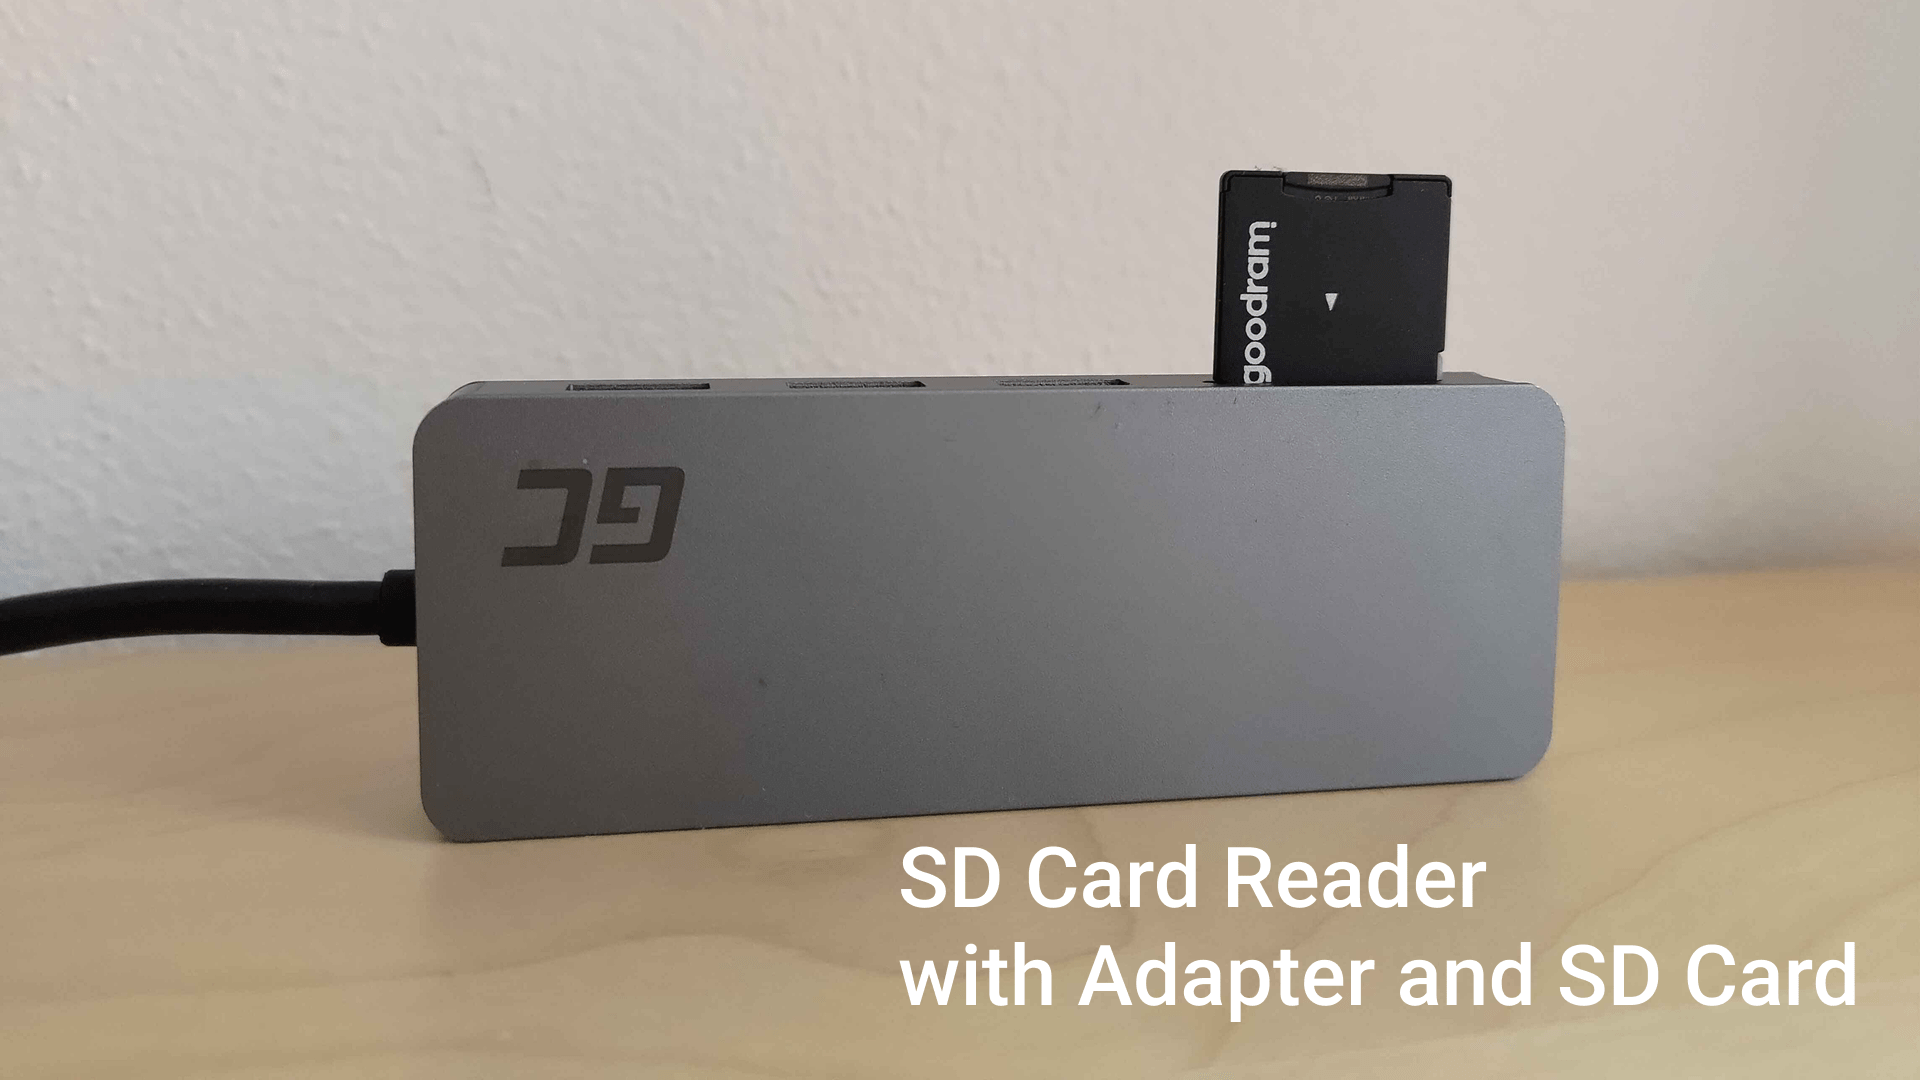
Connect SD Card to your computer to be able to select it as storage in Raspberry Pi Imager.
When installing the OS, make sure to enable SSH, create a new user and set the passsword for the user, so you can log in remotely from your computer. You can also set the hostname to raspberrypi5 instead of the default raspberrypi.
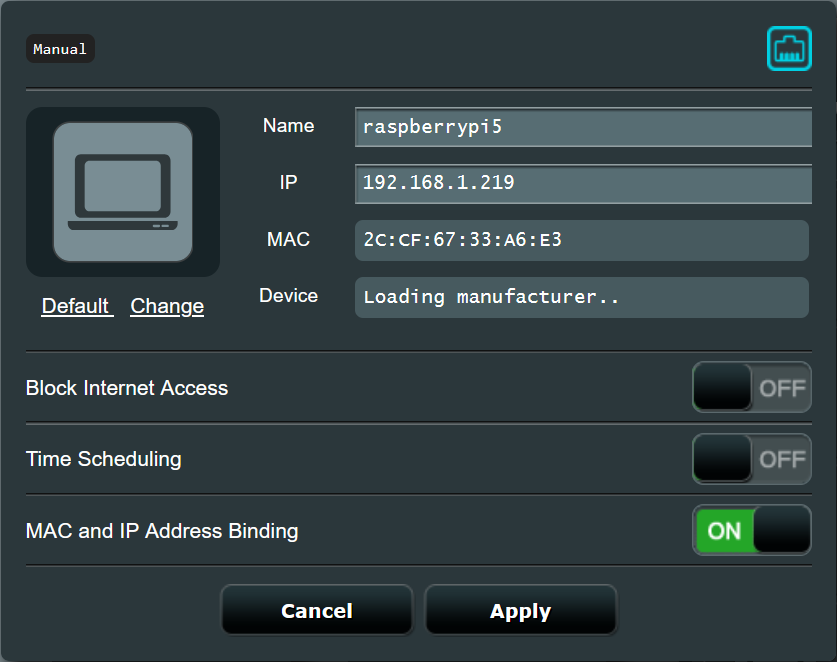
After installing the OS and connecting the Raspberry Pi to the network, you must find the IP address of the device. You can do this by logging in to your router and checking the connected devices. I recommend binding the IP address to the MAC address of the Raspberry Pi, so it doesn't change.
This is how it looks on my router
Then you can connect to the Raspberry Pi through SSH using the username and password you set during the installation.
ssh username@ip_address
However I recommend using a tool like Termius to connect to the server.
It allows you to save the connection and easily manage the files on the server using SFTP.
This is optional, but I recommend enabling the root user for easier management of the server.
Set the password for the root user using this command:
sudo passwd root
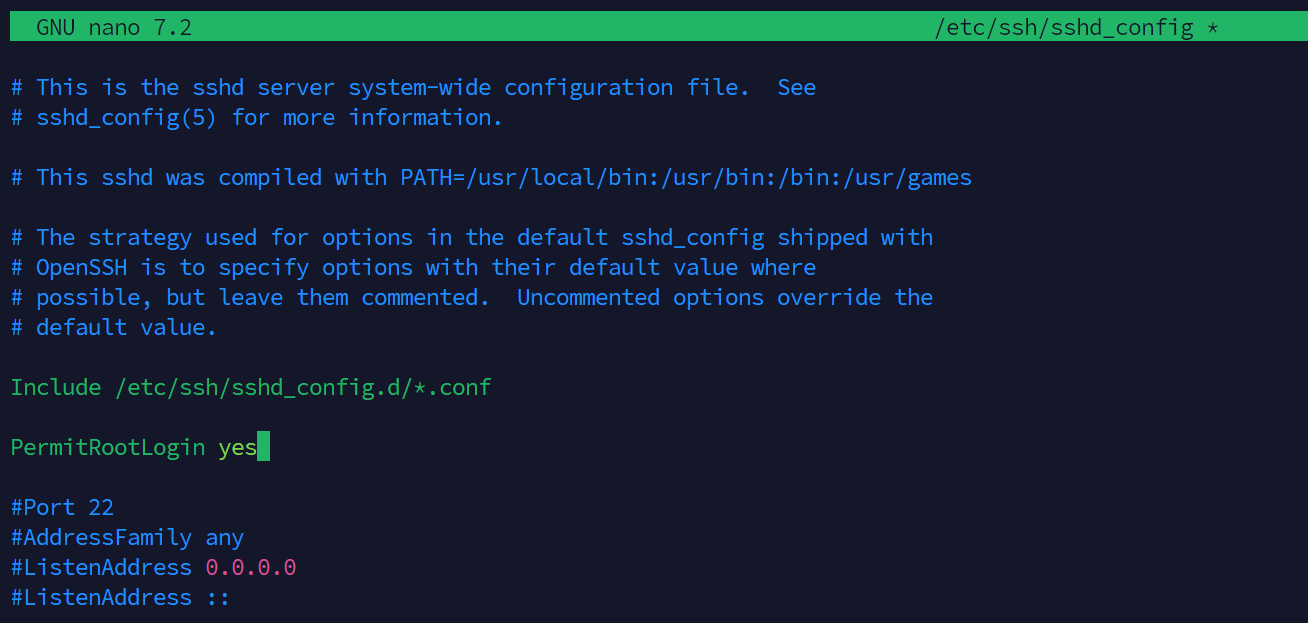
Then enable remote connections to root user, open sshd_config file
sudo nano /etc/ssh/sshd_config
and add the following line to the file, after Include /etc/ssh/sshd_config.d/*.conf line
PermitRootLogin yes
Then restart the ssh service
sudo systemctl restart ssh
Now you can log in as root from your computer
ssh root@ip_address
Or if you are using Termius modify the connection to use root user and password.
SteamCMD requires a kernel page size of 4KB.
To check the current page size run the following command
getconf PAGESIZE
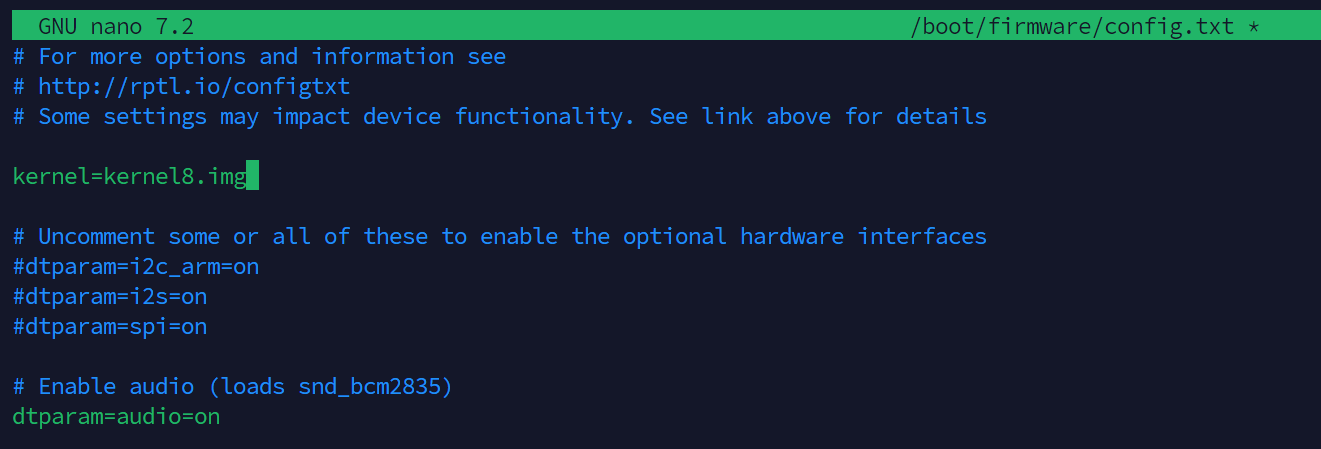
If the page size is not 4KB (4096), but for example 16KB, you will need to change it by editing the boot configuration file
nano /boot/firmware/config.txt
Add the following line to the file
kernel=kernel8.img
Then reboot the device
reboot
Box64 allows you to run x86_64 applications on ARM64 architecture. This is needed to run the Unturned server and SteamCMD, which are x86_64 applications.
Download Box64 repository
wget https://ryanfortner.github.io/box64-debs/box64.list -O /etc/apt/sources.list.d/box64.list
Add Box64 repository
wget -qO- https://ryanfortner.github.io/box64-debs/KEY.gpg | sudo gpg --dearmor -o /etc/apt/trusted.gpg.d/box64-debs-archive-keyring.gpg
Update packages
apt update
Install Box64
apt install box64
While logged in as root, run the following command to install Docker
curl -sSL https://get.docker.com/ | CHANNEL=stable bash
Then enable and start the Docker service
systemctl enable --now docker
Finally you can install the Unturned server using Docker image we created.
First pull the latest version of the image
docker pull ghcr.io/restoremonarchyplugins/rpi5-unturned-server:latest
Then run the following command to create and start the server. This will create a new container named unturned and create a volume named U3DS in the current directory. The port 27115 is used for Rocket RCON. To join the server you will need to use Server Code.
docker run -d \
 --name unturned \
 -p 27115:27115 \
 -v ./U3DS:/opt/U3DS \
 --restart always \
 ghcr.io/restoremonarchyplugins/rpi5-unturned-server:latest
This will install using SteamCMD and start the server. It may take a while to download the server files, depending on your internet connection.
You can check the logs of the server using the following command
docker logs unturned
While the Unturned Dedicated Server app is installing, you may see the following warning in the logs. This is normal and can be ignored.
[BOX32] Warning, long 4294967295 is not a 32bits value
Use the same command to check the logs to see when the server is ready. The Loading level: 100% indicates that the server is ready to be joined.
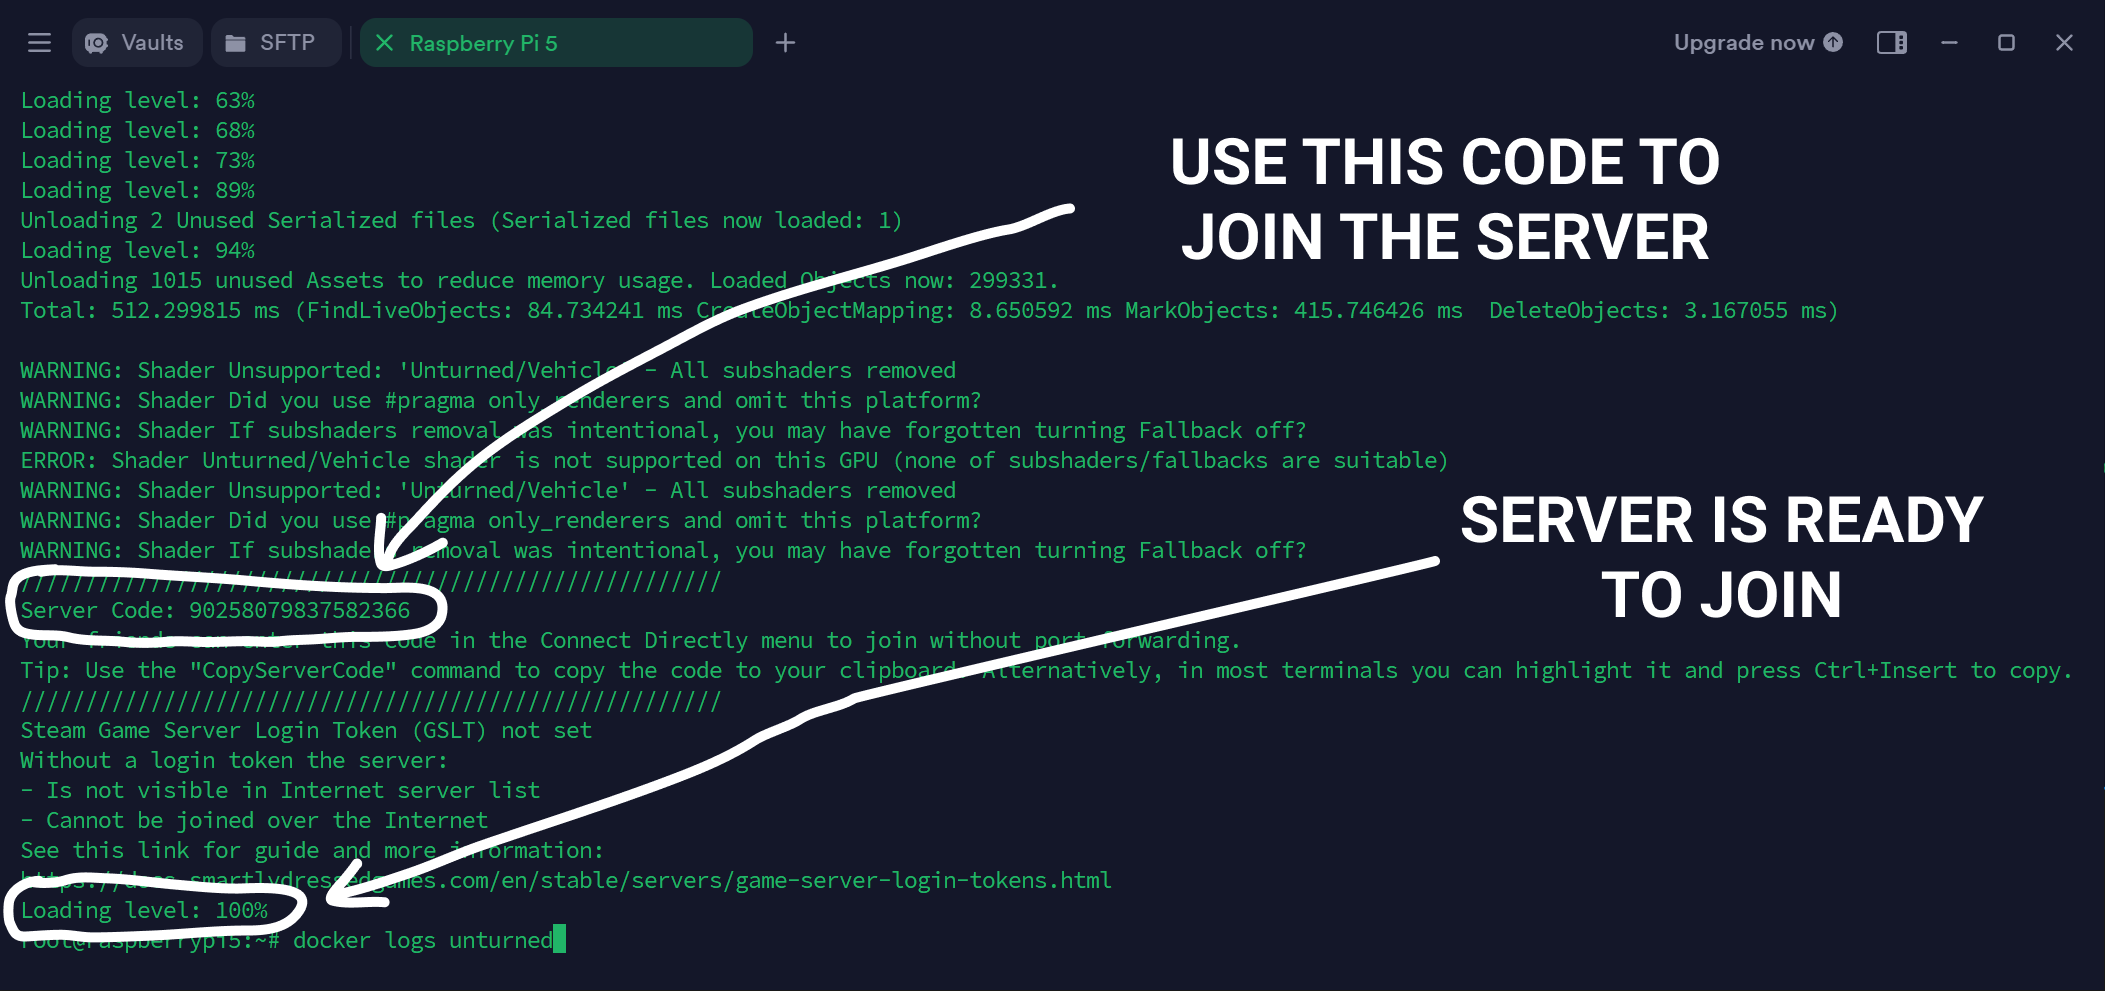
To join the server copy the Server Code from the logs and paste it in the game menu in Connect Directly tab.

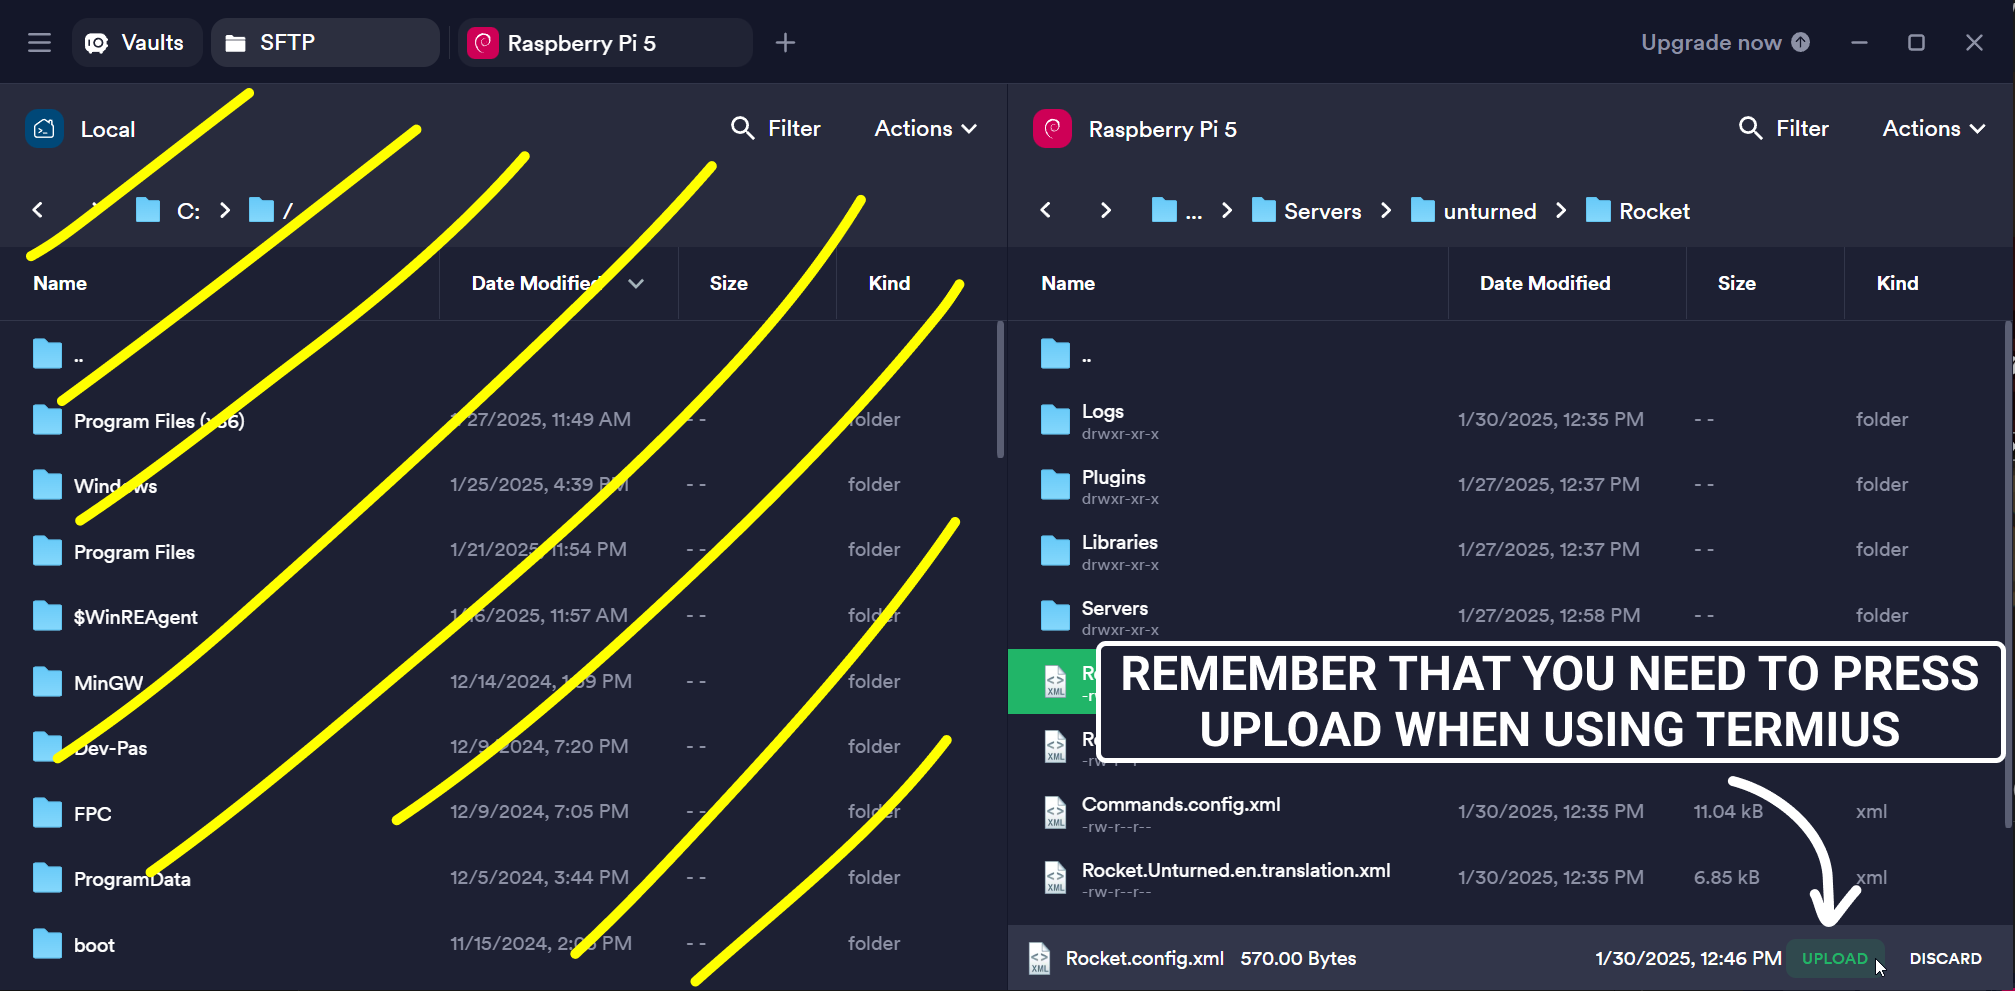
The server files are stored in the U3DS volume. You can access the files by connecting to the server using SFTP. In Termius you have this option.

Navigate to U3DS/Servers/unturned/Rocket and open the Rocket.config.xml file. In the RCON section set Enabled="true" to true. You can also change the password for the RCON which by default is changeme. Save the file.
Then restart the server using the following command using SSH
docker restart unturned
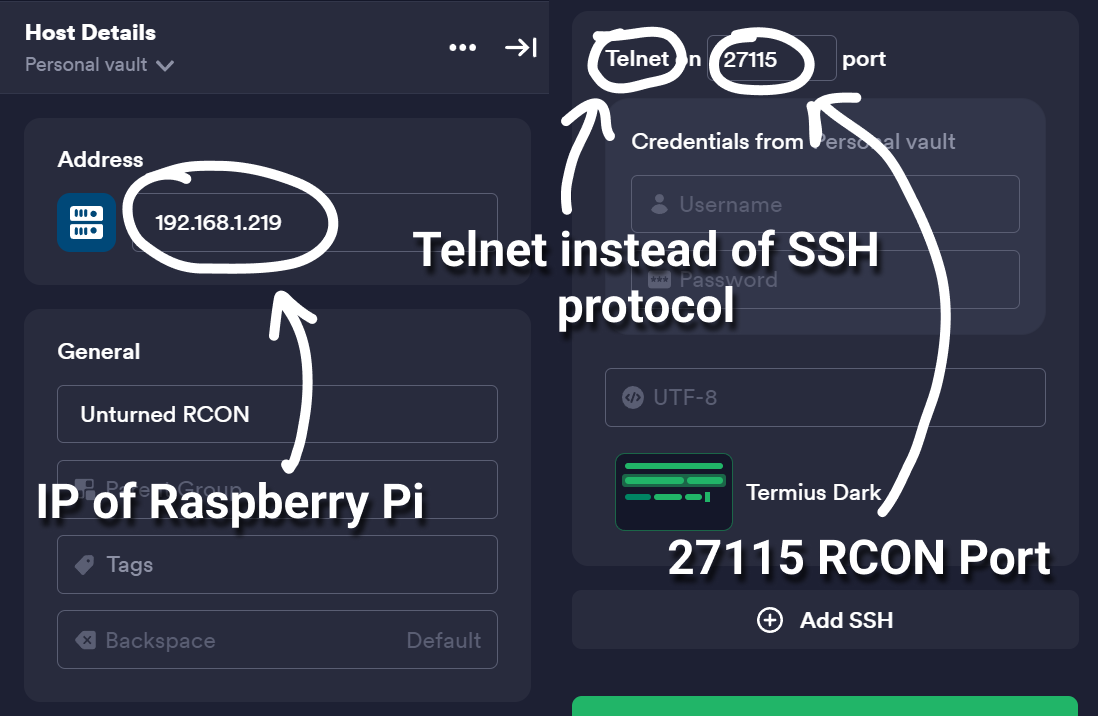
To connect to the server using RCON you have to add a new host in Termius. Use the IP address of the server and the port 27115 for the connection.
Make sure to select Telnet as the connection type. Don't set any username or password credentials.
Then login by typing login changeme in the terminal. Instead of changeme use the password you set in the Rocket.config.xml file. Then press Enter.

If you are not logged out after pressing Enter, you are connected to the server using RCON. You can now use RCON commands to manage the server.
For example you can try the command players and rocket.

Take in mind that this RCON is buggy and you can't use Backspace to delete characters. Play around with it and see what works for you.
You probably won't need to use RCON that much after you give yourself an admin with it by using the command admin <name> and then you can use all of the in-game commands.
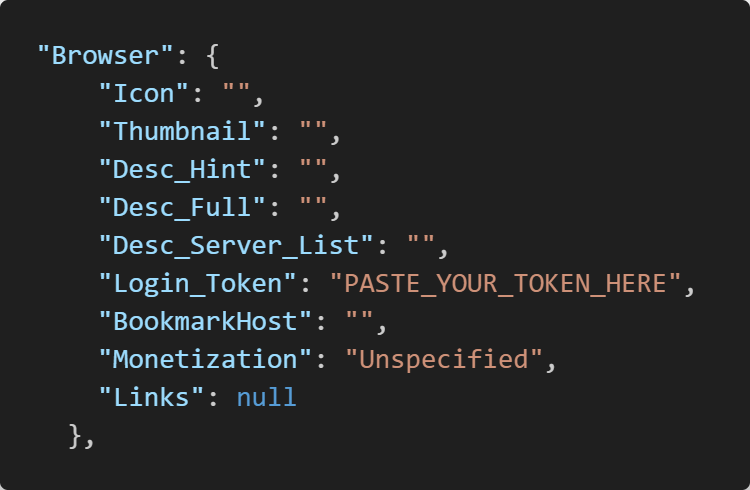
To make the server public you first need to generate a GSLT token. You can do this by logging in to your Steam account and going to the Game Server Login Token page.
After creating the token, you need to enter it in Config.json file in the U3DS/Servers/unturned directory. You can do this by connecting to the server using SFTP and editing the file.
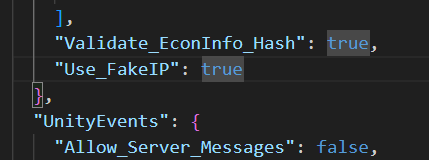
Then at the bottom of "Server" section in the same file, set "Use_FakeIP" valye to true.
Finally restart the server from in-game or RCON using the command shutdown.
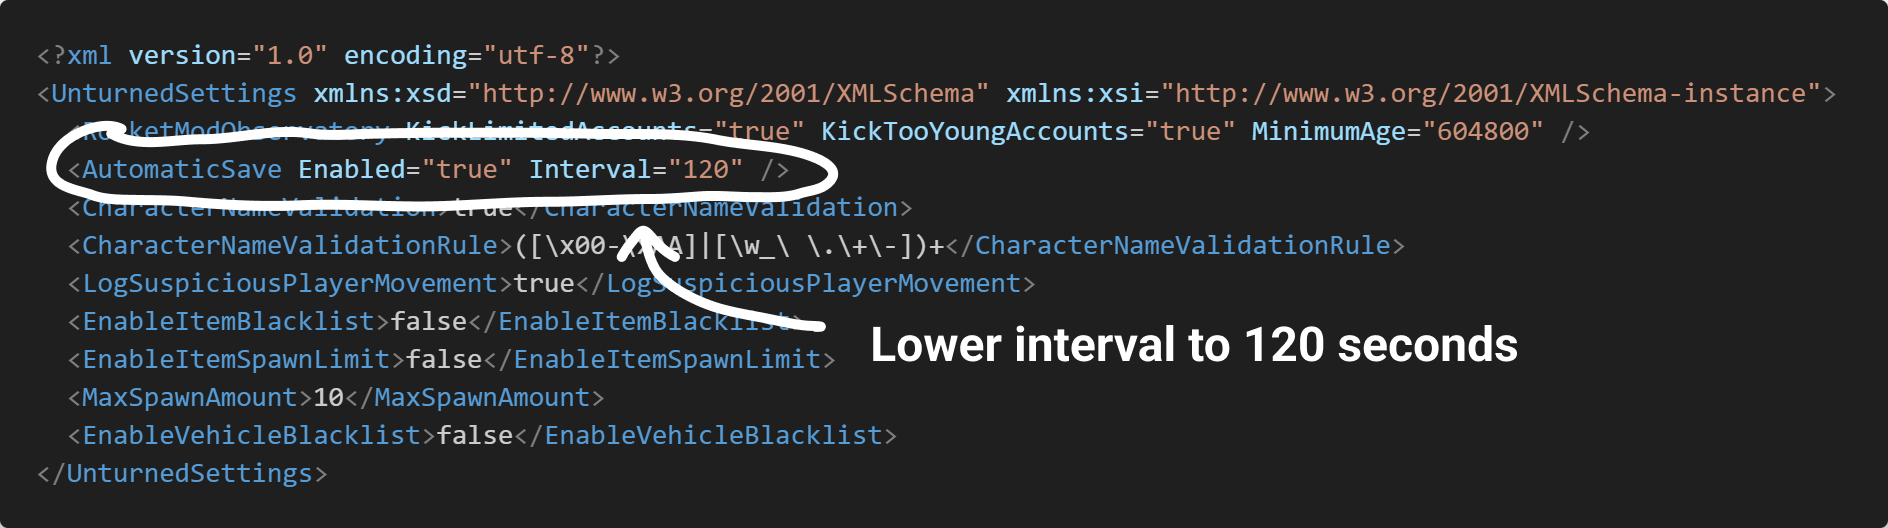
By default the Rocket saves the world every 30 minutes. You can change this by editing the Rocket.Unturned.config.xml file in the U3DS/Servers/unturned/Rocket directory. I recommend setting it to 2 minutes (120 seconds), so in case the server crashes you don't lose much progress.